Every time I bake the Nostalgic Matilda Chocolate Cake Recipe, I’m instantly transported back to cozy family gatherings filled with laughter and the irresistible aroma of rich chocolate wafting through the kitchen. I actually first made this cake for a friend’s birthday, and watching everyone’s reactions as they took that first bite was pure magic—so many compliments and requests for the recipe! It’s that kind of cake that feels like a warm hug, and it’s perfect for celebrating anything or just treating yourself on a quiet evening.
Why This Recipe Shines
- Flavor Harmony: This cake’s rich cocoa and hot coffee blend brings out profound chocolate depth without bitterness.
- Easy Assembly: Simple steps and common ingredients make it approachable for both beginners and experienced bakers.
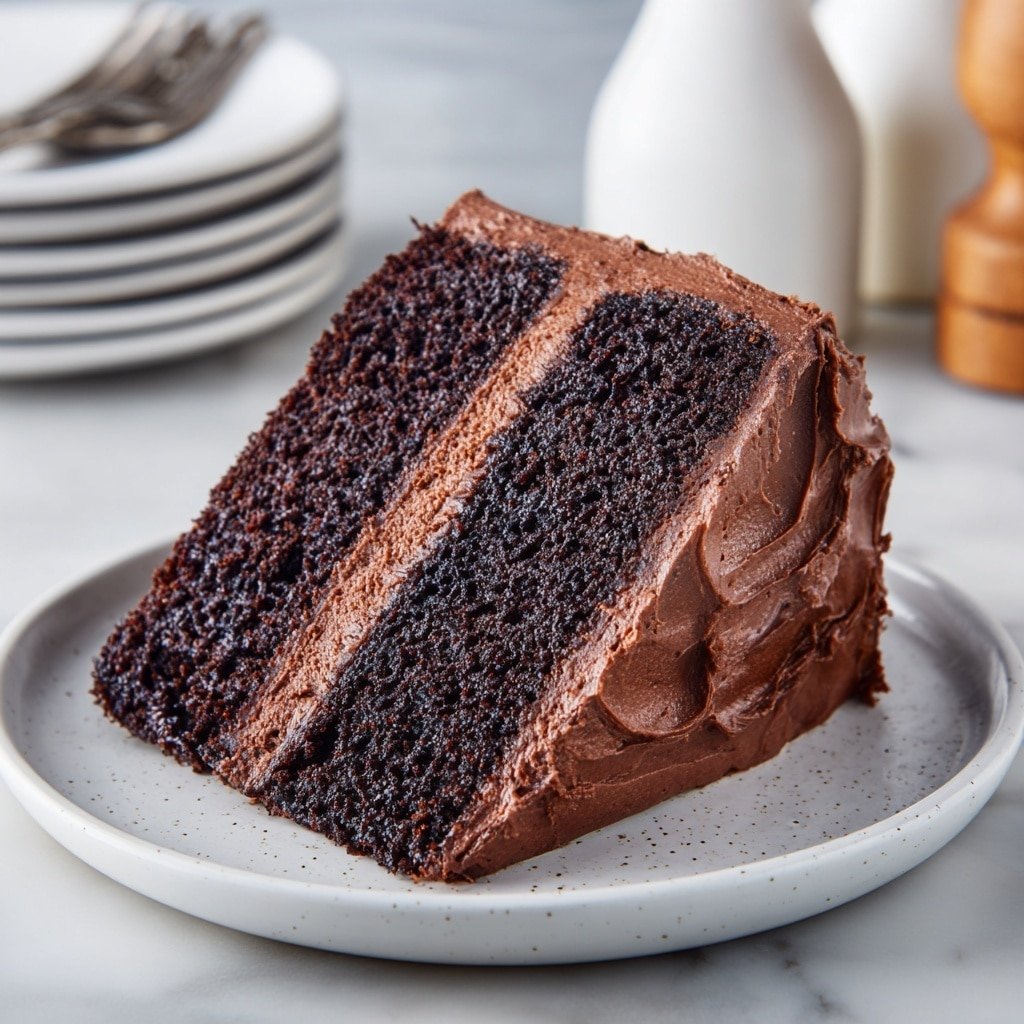
- Texture Play: The thin, tender batter yields moist, fluffy layers that almost melt in your mouth.
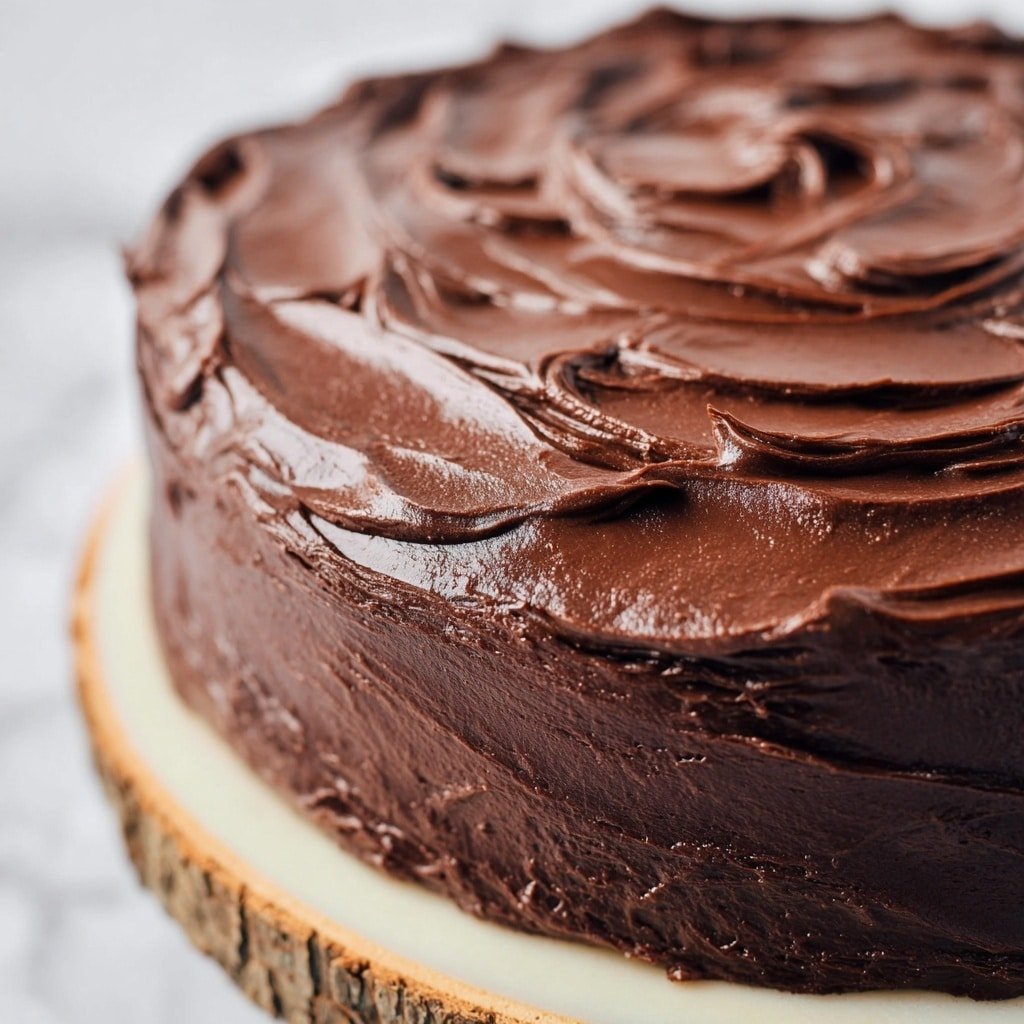
- Showstopper Finish: Smooth, luscious chocolate frosting completes it with elegance and decadence.
What makes the Nostalgic Matilda Chocolate Cake Recipe stand out is how its deep chocolate aroma fills your kitchen while baking, drying into layers that boast the perfect balance of moistness and crumb. The glossy frosting has that gentle snap of semi-sweet chocolate yet stays fluffy and spreadable — it’s a texture I always look forward to spreading lovingly between each layer and on the outside. You’ll notice the subtle warmth from the coffee that transforms this cake from ordinary into something really special.
Don’t worry if you’re new to baking. I’ll walk you through every little step to make sure your Nostalgic Matilda Chocolate Cake Recipe is a success from start to finish. From mixing just enough to keep the cake tender to handling cooling times for the perfect finish, you’ve got this—and I’m right here with you!

Ingredients You’ll Be Working With
Measuring your ingredients carefully is key to nailing this cake’s signature texture. Be sure to check the printable recipe card below for exact amounts that make all the difference.
- All-purpose flour: Provides structure; spoon and level for a tender crumb.
- Granulated sugar: Sweetens and helps create a soft texture.
- Dutch-processed cocoa powder: Offers rich color and smooth chocolate flavor—don’t substitute with natural cocoa.
- Baking soda and baking powder: Work together for the perfect rise and lightness.
- Salt: Enhances the chocolate and balances sweetness.
- Buttermilk: Adds tang and tenderness; room temperature is ideal.
- Vegetable oil: Keeps the cake moist; neutral flavor.
- Eggs: Bind ingredients and contribute richness; use at room temp.
- Vanilla extract: Rounds out the flavor beautifully.
- Hot coffee: Intensifies chocolate flavor without making the batter bitter.
- Unsalted butter and semi-sweet chocolate: For that luscious, glossy frosting.
- Powdered sugar: Sweetens and smooths the frosting.
- Heavy cream or milk: Controls frosting texture; heavier cream yields richer results.
- Pinch of salt (frosting): Balances the sweetness and enhances chocolate depth.
If you need to swap, dairy-free milk works fine in the frosting (just use a bit less), and vegetable oil can be replaced by mild-tasting oils like canola or even melted coconut oil for subtle flavor twists.
Chef’s Note
You’ll find the complete list of ingredients with exact measurements in the printable recipe card at the bottom of this post.
Tools You’ll Need
- Stand mixer or hand mixer: Speeds up mixing and ensures smooth batter and frosting.
- Two 9-inch round cake pans: For baking even layers; parchment-lined to prevent sticking.
- Sifter or fine-mesh sieve: Essential to avoid lumps in dry ingredients and frosting.
- Measuring cups and spoons: Accurate measurement is key to getting the right texture.
- Kitchen scale (optional): Helps divide batter evenly for perfect layers.
- Rubber spatula: For scraping bowls fully and folding ingredients gently.
- Cooling rack: Allows cakes to cool evenly to prevent soggy bottoms.
- Saucepan or microwave-safe bowl: For melting chocolate and butter smoothly.
How to Make Nostalgic Matilda Chocolate Cake Recipe
Ready to bake? I’ll guide you through the process in a few straightforward steps that emphasize gentle mixing and careful timing—this is how you get tender, moist layers and silky frosting every time.
- Prep your pans and oven: Preheat the oven to 350°F (175°C). Grease and flour two 9-inch round pans, then line the bottoms with parchment rounds for easy cake release—trust me, this little trick saves so much hassle.
- Mix dry ingredients: Sift together flour, sugar, cocoa powder, baking soda, baking powder, and salt into a large bowl. Whisk them briefly to combine and create a smooth, lump-free base resembling rich soil.
- Combine wet ingredients: In another bowl, whisk buttermilk, vegetable oil, eggs, and vanilla until blended and smooth. Room temperature eggs are your secret here—they mix more evenly.
- Mix wet into dry: Add the wet mixture to the dry, mixing on low speed until just moistened. Don’t overdo it; a gentle hand keeps the cake tender.
- Incorporate hot coffee: Slowly pour in the freshly brewed hot coffee while mixing gently. The batter will thin out considerably—this is perfect; it means the coffee is intensifying the cocoa flavor while keeping your cake so moist it practically melts.
- Divide and bake: Pour the batter evenly into your pans (a kitchen scale can help here, but eyeballing works too). Tap pans lightly to release air bubbles, then bake for 30–35 minutes. Check doneness by inserting a toothpick—it should come out with a few moist crumbs, not wet batter.
- Cool the layers: Let cakes cool in the pans on a wire rack for about 15 minutes, then turn them out onto the rack to cool completely. Full cooling prevents frosting headaches later on!
- Make the frosting: Melt butter and chopped chocolate together gently until glossy and smooth. Transfer to a large bowl, sift in cocoa powder and powdered sugar, then beat on low. Add heavy cream, vanilla, and salt, then increase speed to medium-high, beating for 2–3 minutes until light, fluffy, and spreadable.
- Assemble your cake: Place one cooled layer on your serving plate. Spread a generous layer of frosting over it, then top with the second cake. Cover the top and sides with the remaining frosting, using a spatula or offset knife for a smooth finish. Go ahead—be generous and make it irresistible!
Kitchen Wisdom
- Tip 1: Always use room temperature eggs and buttermilk for smoother mixing and tender crumb.
- Tip 2: The thin batter is completely normal; don’t add flour or hesitate while baking.
- Tip 3: Test for doneness early to avoid drying out the cake layers.
- Tip 4: Let layers cool fully; frosting on warm cake leads to melting and sliding.
How to Serve
Flavor Boosters
Try dusting the top with a light sprinkle of cocoa powder or some finely chopped toasted nuts for an extra crunch. Fresh berries or a dollop of whipped cream on the side complement the deep chocolate flavor beautifully. If you want to add a zing, a drizzle of raspberry coulis or salted caramel sauce works wonders to elevate this nostalgic classic.
Perfect Pairings
A robust cup of coffee or espresso balances the cake’s richness perfectly. For evening occasions, serve it alongside a glass of ruby port or a creamy stout beer. Milk lovers will enjoy a cold glass of whole milk or even a vanilla-infused almond milk for a dairy-free twist that still complements the flavors wonderfully.
Presentation Touches
Slice your Nostalgic Matilda Chocolate Cake Recipe with a warm, clean knife for neat edges—dip it in hot water and dry between cuts to glide smoothly. For parties, consider serving individual portions in small dessert plates with a garnish like a mint leaf or edible flower. It also makes a fabulous gift when wrapped in parchment paper and tied with a rustic ribbon—your friends will adore the thoughtful, homemade touch.
Variations & Easy Swaps
- Use almond or coconut milk instead of buttermilk for a dairy-free option; add 1 tbsp lemon juice to mimic tang.
- Add a teaspoon of instant espresso powder with cocoa for an extra mocha kick.
- Swap semi-sweet chocolate in frosting with dark chocolate for a slightly more intense flavor.
- Fold in a half cup of chopped nuts or chocolate chips to the batter for added texture.
- Try a peppermint extract twist in frosting for holiday seasons.
- Replace vegetable oil with melted coconut oil for a subtle coconut aroma.
Make-Ahead, Storage & Reheating
- Make the cake layers a day ahead; wrap tightly in plastic wrap and store at room temperature.
- Keep frosted cake covered in an airtight container or cake dome at room temperature for up to 2 days, or refrigerate up to 5 days.
- For longer storage, freeze unfrosted layers wrapped well for up to 3 months. Thaw overnight in the fridge before frosting.
- To refresh refrigerated cake, let it come to room temperature before serving. Avoid microwaving frosted cake as it can cause frosting to melt unevenly.
FAQs
Q: Can I make this cake gluten-free?A: Yes! Substitute the all-purpose flour with a 1:1 gluten-free flour blend, and add 1/2 tsp xanthan gum if your blend doesn’t already contain it for better structure. Q: Why is hot coffee used in the batter?
A: The hot coffee blooms the cocoa powder, unlocking deeper chocolate flavor and making the cake incredibly moist without tasting like coffee. Q: How do I know when the cake is done?
A: Insert a toothpick into the center—it’s ready when it comes out with just a few moist crumbs, not wet batter. Don’t overbake to keep it tender. Q: Can I make the frosting ahead?
A: Absolutely! Prepare the frosting up to 2 days in advance, store it chilled, and whip it slightly again before spreading for best texture.